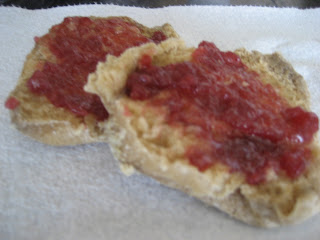
I have been making homemade bread for about six months now. Last week we ran out and I was feeling so tired and pregnant that I decided to splurge and buy a loaf from the store. Wow, that was a BIG disappointment! It was the first time we have bought bread for six months and the taste and texture were just awful. Needless to say, today I made two batches of bread:) Our home smells amazing.

Making homemade bread is a "win" situation no matter how you slice it (that pun was for my husband). It tastes better than bread from the store, it's healthier because you control what goes into it, and it's cheaper. After trying out several bread recipes and putting them to the test on my husband's refined palate, this is the recipe that won time after time. I got it from my friend, Jill, so we call it Jill's Bread. She got it from her mom who got it somewhere else, but I think it's just easier to give all the credit to Jill:) I now make a batch of bread every week and we love it. There is nothing more cozy than a home that smells like fresh-baked bread.
Today I am going to give you a bread recipe, tell you where to buy everything, do a cost breakdown, and do a calorie breakdown. Hold on to your horses.
Jill's Bread: I use three normal loaf pans (9 in. x 5 in.), but Jill uses five small loaf pans (8 in. x 4 in.). It's really a matter of your preference of how big you like your loaves and your slices of bread.
- 12 cups whole wheat flour (I grind my own wheat, but you can buy the flour already ground)
- 3 Tbsp. yeast
- 2 Tbsp. salt
- 1/3 cup vital wheat gluten
- 2/3 cup vegetable oil
- 2/3 cup honey
- 4-6 cups lukewarm water
Directions: Grease your loaf pans. Combine gluten, honey, oil, yeast, and salt in mixer (if you have a Bosch or KitchenAid) and mix on medium speed with the dough hook attachment. While the mixer is still going, add one cup of flour at a time, while slowly pouring in the water. When dough begins pulling away from the sides of the bowl and the dough is slightly sticky to the touch, stop adding flour and water. Knead bread on low for 8 minutes, or knead by hand.
Take dough out of mixer and place on slightly floured surface. Form into a smooth ball and separate into 3 (or 5 if using small loaf pans) equal portions. Smooth each ball and place in prepared pans. Let rise about 30 minutes, or until double. Bake at 350 degrees for 30 minutes for regular loaf pans, 25 minutes for small loaf pans.
Let me give you a few pointers that I have learned to make things go more smoothly:
- I don't have a Bosch or a KitchenAid, but I do have a bread maker that does the kneading for me. I mix all the dry ingredients together first and then add the wet ingredients and let my bread maker knead for about 20 minutes.
- Use the same measuring cup for the oil and for the honey. If you measure the oil first, the honey will slip right out of the measuring cup and be easier to clean up.
- Don't let the bread rise too much in the loaf pans or it will collapse when you cook it. Maybe we have a warm kitchen because we live in Arizona, but I never let my loaves rise for more than 30 minutes.
- I always add about 4 cups of water. Sometimes I add a little more than that, but I have never added close to 6 cups. Maybe it depends on where you live (altitude, humidity). I don't know. You want your dough sticky, but not so wet that you could wring it out:)

If you have a membership to Costco or Sam's Club you will want to buy all of the ingredients there except for wheat and wheat gluten. I buy my wheat at the
LDS Cannery in Mesa (they have locations all over the place) and then grind it on my own. You don't have to be a member of the church to buy stuff there. Just walk in and ask for a bag of wheat and they'll sell it to you. I buy my wheat gluten on Amazon, although you can find it at Sprouts or Wal-Mart. It's just slightly cheaper and much easier to have it delivered right to my door:) Here is the link if you want to buy it on Amazon:
Bob's Red Mill Gluten Flour, 22-Ounce Packages (Pack of 4) Cost Breakdown:
 When I first started making bread I really wondered if I was saving any money at all since it seemed like some of the ingredients (especially the honey) were really expensive. So I did my own cost analysis to find out. Here is what I found:
- 25 pounds wheat = $11.45
- 2 pounds yeast = $4.68
- 4 pounds salt = $0.98
- 22 oz. bag vital wheat gluten = $5.02
- 1.25 gallons vegetable oil = $8.99
- 5 pounds honey = $9.77
After doing lots of boring math (that I found exciting) I found that at the prices I have listed it costs $3.52 per batch of bread. If you make 3 loaves, like I do, it's
$1.17 per loaf. Not bad! This week at the store I found that really nice bread like Oroweat runs about $3 per loaf on sale. Even if you go for the cheap generic sandwich bread you are still looking at $1.50 per loaf. Savings all around!
 Nutrition Breakdown:
 I wanted to do this just to make sure I wasn't going to make myself fatter by making my own bread. Again, through lots of boring calculations that I really enjoyed doing I found that there are about 7,840 calories per batch of bread. If you make 3 loaves out of it and slice it into 15 slices each (using my awesome bread slicer
here) then it works out to be about
175 calories per slice. Obviously, that would be less if you make 5 smaller loaves per batch (around 130 calories per slice). Oroweat bread costs you around 100 calories per slice, so there is definitely a trade-off there. However, in store-bought bread there are a lot of preservatives and fillers. In the sandwich loaf I bought this week I counted almost 30 ingredients! Homemade bread is great because there are only 7 ingredients and you can control the quality of everything you mix into it. So I guess it's just a trade-off.
I really love this recipe because it uses 100% whole wheat, which means it's loaded with fiber. There are 216 grams of fiber per batch of this baby, which breaks down to
4.8 grams of fiber per slice. There are also 203 grams of protein per batch, which means
4.5 grams of protein per slice. That ain't bad.
Have I convinced you to make your own bread yet? I promise, once you do, you'll never go back to the stuff you find on the shelf at the grocery store:)
(Note: Some links in this post are my affiliate links.
I will never recommend anything to my readers that I wouldn't buy
myself.)


